How to Choose Solar Motion Spotlights for Outdoor Use
A dark driveway, side gate, or garden path can feel less secure when a motion light misses approaching movement. Choosing the right solar spotlight means matching its performance to the actual space, not just picking the brightest product on a page. Solar Motion Spotlights Outdoor vary in brightness, detection range, battery capacity, and weather resistance. Those details shape how reliably a light works after cloudy days or frequent nighttime activation.
Start by checking how much direct sun reaches the proposed panel. A shaded wall may not recharge a battery as expected. Look for clear specifications on light output, sensor distance, detection angle, and charging time, then compare them with the area you need to cover. Shorter paths may need a different setup than wide driveways. Check the stated water-resistance rating and installation guidance, too; exposed locations face rain, wind, and seasonal temperature changes. Small details matter.
It is tempting to trust a large lumen number alone. That can mislead. A focused beam may illuminate a gate well but leave nearby steps dark, while a broad beam may spread light more evenly. Adjustable sensor settings and separate panel placement can help, though not every model offers them. Product specifications provide a useful starting point, but real performance depends on sunlight, mounting height, and how often the light activates. A careful choice balances coverage, charging conditions, durability, and ease of adjustment—and leaves room to reassess after installation.
Identify the Outdoor Areas and Lighting Needs
Walk the property after dusk before choosing solar motion spotlights. Note where people actually move: front steps, a side gate, a bin area, or a dark stretch beside the garage. Check each spot from standing height. A beam that misses a step can still leave a visitor squinting into glare. Measure the area, too; a narrow doorway needs a different beam spread than a driveway. Then check daytime sun and shade, since a panel beneath a deep eave may not recharge reliably.
Match the light to the task. A doorway may need a focused beam, while a path benefits from broader, lower-glare coverage. Avoid aiming sensors toward busy streets, swaying branches, or warm vents; false triggers can drain the battery. DarkSky International estimates that at least 30% of outdoor lighting in the United States is wasted. That figure supports a practical choice: illuminate the needed surface, not the whole yard. I still find that a quick daytime glance can miss a shadow cast by a fence at night.
Tips: Test the sensor after installation from several approach angles. Adjust its range so it catches a person near the entry, not every passing car. Mark the darkest patch with tape, then check it again after sunset.
Compare Solar Panels, Batteries, and Light Output
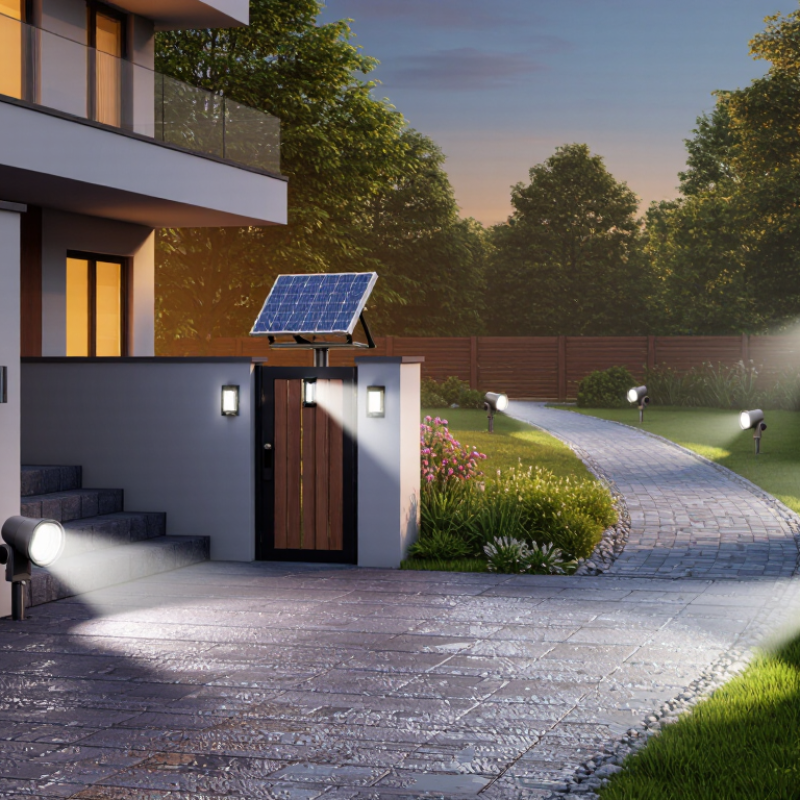
Solar motion spotlights work best when their panel, battery, and light output suit the same location. A panel facing open sky can recharge reliably; one shaded by eaves may struggle, even with a large battery. Check whether the panel is separate, so you can position it in sunlight while aiming the lamp at a gate or path. Small details matter.
Battery capacity is often listed in watt-hours (Wh), while brightness appears in lumens. Higher lumens can improve visibility, but they also draw more power and may shorten runtime. NREL’s review of photovoltaic systems found a median module degradation rate of about 0.5% per year. That figure describes larger PV modules, not every compact spotlight panel; dirt, shade, and heat can have a bigger practical effect. Specs alone don’t tell the whole story. Compare expected runtime at the chosen brightness, and check whether motion activation or dim modes help conserve charge.
Tips: Look for adjustable brightness, a replaceable battery, and a panel cable long enough for a sunny mounting spot. After installation, check the light on a cloudy week. The real-world result may surprise you.
Evaluate Motion Sensors, Detection Range, and Lighting Modes
How to Choose Solar Motion Spotlights for Outdoor Use
Evaluate a spotlight’s motion sensor, detection range, and lighting modes before comparing brightness alone. A passive infrared sensor detects changes in heat, so its view should cross the path people actually use. Mounting it too high or aiming it toward moving branches can cause missed detections or frequent false triggers. Small details matter. Check whether the sensor angle can be adjusted.
Treat the advertised detection range as a guide, not a promise. Walls, fences, cold weather, and the direction someone approaches can affect performance. Test the light from several points along your driveway or garden path after installation. A 30-foot range may work well in an open yard but feel shorter around a corner. I have found that a quick evening test can reveal more than a specification sheet, though one test may not reflect every season.
Lighting modes should match the area. A dim standby glow with full brightness on motion can conserve stored energy, while a timed mode may suit a frequently used entrance. Tips: Set the sensor to a moderate range first. Adjust the angle, then test again. Keep the solar panel clear of shade, and remember that winter daylight may reduce charging time.
How to Choose Solar Motion Spotlights for Outdoor Use - Evaluate Motion Sensors, Detection Range, and Lighting Modes
Typical specifications and performance vary by product, installation height, weather, sunlight exposure, and site conditions. Check the manufacturer’s stated range and test the light after installation.
Check Weather Resistance and Installation Requirements
Outdoor weather resistance is more than a sealed-looking plastic case. Check the spotlight’s IP rating and what its manufacturer says that rating covers. For example, IP65 indicates protection from dust and water jets, but it does not mean the light can be submerged. Rain can also blow beneath eaves or collect around a poorly placed seal. Small details matter.
Check the stated operating temperature range, too. A unit may face freezing nights, hot walls, or repeated wet-and-dry cycles. Look for covered battery and cable compartments, and inspect any rubber seals before mounting. They should sit flat, without gaps or pinched edges. Avoid placing the light where sprinklers hit it daily. That wear is easy to overlook.
Installation affects both durability and performance. Choose a firm surface, such as a sound fence post or masonry wall, and use fixings suited to that material. Confirm the required mounting height and sensor angle in the instructions; a sensor aimed at a warm wall may trigger unpredictably. Place the solar panel where it receives several hours of direct sun, not just bright shade. Test the light after dark, then adjust its angle and sensitivity. One imperfect detail: nearby branches may cast moving shadows, so seasonal trimming might be needed. Don’t overtighten screws; cracked housings can admit water.
How to Choose Solar Motion Spotlights for Outdoor Use
Check the water-protection rating and installation requirements before choosing a fixture.
IPX4 indicates protection against splashing water; IPX5 against water jets; and IPX6 against powerful water jets. These are water-protection ratings, not a guarantee of protection against immersion or dust. Check the product instructions for its specific mounting requirements, and position the solar panel where it can receive adequate sunlight.
Choose a Spotlight That Fits Your Budget and Use Case
Choose a solar motion spotlight for the area you actually need to see, not the largest number on the package. A narrow path beside a garage may need one adjustable head and a modest detection range. A wide driveway could benefit from two heads and broader coverage. Check the stated light output, but also look for adjustable brightness; maximum output can drain the battery faster.
Set a budget around the fixture’s full setup. A lower-priced spotlight may work well near a sunny fence, where its panel receives several hours of direct light. In a shaded yard, a model with a separate panel and a longer cable may be more useful, even if it costs more. Check whether the panel can face the sun without pointing the light away from the area you want covered. Small detail. Big difference.
Also compare weather protection, motion-sensor adjustments, and battery replacement options. If the light is near a door, adjustable sensitivity can help reduce triggering from passing cars or moving branches. Be realistic about winter performance: shorter days and cloudy weather can mean less light at night. There is no perfect budget choice, and I’d rather accept a dimmer setting than buy extra brightness I rarely use. Before installing several fixtures, try one in the intended spot and observe its coverage for a few evenings.